Time for some Spring Bling. Just looking out the windows this morning at a winter wonderland. Nice picture until you pull the shovel out and wonder when your poor hearts gonna give out! Well to put a positive spin on this pretty ominous day, we needed to pizazz with some color jazz. Actually when the weather was beautiful, I was inside sewing. Whats wrong with this picture?
Hopefully these pics paint a brighter day:
 |
| I measured my windows and added 1/2 inch seam allowance. Marked out my fabric with my chalk marker. Notice I laid this out on the fold. This fabric was a buck a meter. |
 |
| This is my lay-out |
 |
| Four windows = eight pieces. |
 |
| Wanted to put some coordinating trim. I also inserted a tassel at the center point. |
 |
| I cut strips of a coordinating fabric and sewed them together to insert my welting |
 |
| Trim is ready to use. |
 |
| I put my fabric right sides together with trim and tassel inside. |
 |
| Sewed all the layers together! |
 |
| Turned right side out....and voila! |
 |
| All three done for the bigger windows. One left to make for the smaller window. |
 |
| I originally stapled my valance to a trim board cut to the width of my window frame. When I dry fitted into place, I realized that the trim piece was visible....duh! |
 |
| I covered the trim piece with some fabric. |
 |
| I used some double sided tape to hold in place. I must confess I only used this for one as the fit was tight enough to hold them in place while I tacked them up. |

 |
| First window. |
 |
| Second window |
 |
| Third window. |
 |
| This is how I installed them. |
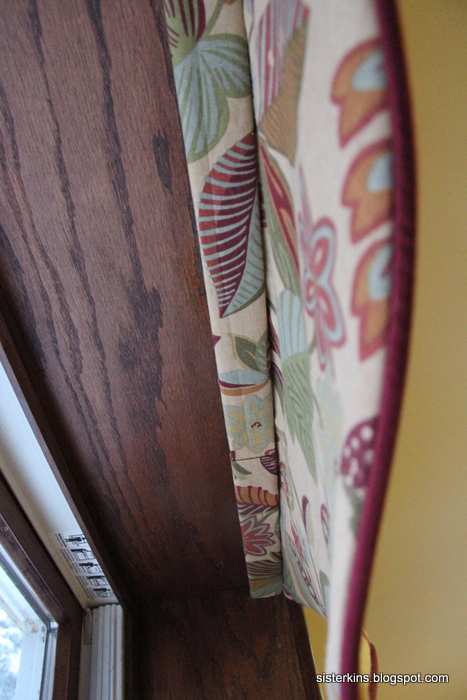 |
| A look from underneath. |
 |
| I used two finishing nails to install the valances. |
 |
| All three big windows done! |
 |
| Small window complete. |
Well that's my Window Bling!
Hope you are having a great week
Oonga
Sisterkins
Linking Up With
Linking Up With